Configuring Search in SharePoint Server 2013 is not a simple task. There are some critical options that need to be taken care of while configuring. Most of them are illustrated below:
From
the Central Admin Home page click Manage service applications under Application
Management…

In
the Ribbon click New and select Search Service Application.

Name
your Search Service Application and Select a service account

Next
you’ll select or create an application pool for search. I’m just going to
run on a existing app pool to conserve resources. If this were production
I’d likely create a new app pool for both the search admin web service and the
search query and site settings web service.


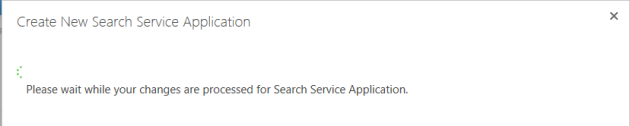
Click
OK and wait…
Upon
completion you’ll be presented with the following:

Note:
the second time I configured the service app I accessed Central Admin from a
computer that wasn’t part of the farm and it appeared to get hung up. I
then browsed to the service applications screen, search showed up just as
it does below and everything works as it should.

Now
we shall focus on Content Sources. On the Search Administration page there
are several links broken into titled categories. The second group is
titled Crawling.

“A
content source is a set of options that you use to specify what, when and how
to crawl.”
When
Search is initially configured the content source “Local SharePoint sites” is
created, and as the name implies this includes all SharePoint sites in your
farm. As you create additional web apps they are automatically added to
this content source. Another thing to note is that changing your default
AAM will result in that URL being added to your content source in addition to
whatever the original URL of your site was, so there may be need for
cleanup.
This
is also good to know,
“Changing a content source requires a full crawl for that content
source”
To read more
about add, edit or delete content sources in SharePoint Server 2013
Clicking
on Content Sources will bring you to the Manage Content Sources page…

Clicking
on the dropdown will result in the following menu appearing…

Clicking Edit
or on the Name will bring you to the edit content source page.


From
this page your initial options are to name your content source, view content
source details and add or remove start addresses. Keep in mind that
the Edit and Add pages are basically the same. Obviously,
you are going to need to click the New Content Source button to get to the
Add Content Source page etc… A start address is the point from
which the crawler will begin to crawl your site. Typically Local
SharePoint sites is going to have all of your web apps listed by
default.
Crawl
Settings really only applies to when you are creating a content source because
once you have selected a setting you can’t change it. When creating
a content source you have the following options.

Switching
between the first 4 of these really just changes the path requirement, as
illustrated in the screen shot below.

However,
Line of Business data and Custom Repository require significantly different
information… Line of Business Data requires you to select a BCS Service
application which of course requires that you have BCS provisioned and a
Service Application is connected to some LOB System.
More
information on both source types can be found here…
And
here…

A
Custom Repository requires that you have a Custom Connector registered.

Your
only edit options are,
“Crawl
everything under the hostname for each start address”
Or
“Only
crawl the Site Collection of each start address”.
The
second option would be used if you want to crawl some site collections in a web
app less or more often than others. There are several factors that would
go into a decision like this. For instance, varying content change
frequency between site collections.
The
next section deals with Crawl Schedules. Crawl
Schedules has the new option, Enable Continuous Crawls.
“Enable
continuous crawls is a crawl schedule option that is new in SharePoint 2013. It
is available only for content sources that use the SharePoint sites content
source type. A continuous crawl starts at set intervals. The default interval
is 15 minutes, but you can set continuous crawls to occur at shorter intervals
by using Windows PowerShell.”
The
familiar Incremental Crawl and Full Crawl scheduling options are next.
Both of which allow you to create a schedule. Crawl schedules
require a good bit of planning and are very much dependent on the specific
needs of the environment.
Last
we have Content Source Priority. Your options here are High and
Normal. The Crawl system uses this to prioritize crawling resources with
High content sources being top priority.
From
a Content Source’s drop down menu the View Crawl Log options is available.

Clicking
on this will bring you to the crawl log
.

This
screen provides you with Average Crawl Duration and Summary information.
This is where you go asses the health of your content source crawls, and is
going to be your first stop when you need to troubleshoot content source
issues.
Clicking
on the number of errors will bring you to this page…

You
will be taken to this same page, filtered appropriately, if you click on
Warnings or Successes. URL View allows you to search for crawled
documents. Databases provides a list of your crawl store databases and
the number of items in each. For more information I suggest reading this
TechNet article…